思考并回答以下问题:
- 暂时不执行,等之后一起执行。原先的做不到,命令模式可以做到。怎么理解?
- Invoker中分别使用List、Queue、Stack可以实现对多个命令的不同管理。怎么理解?
- 有这种游戏,先输入好几个移动命令,然后按Enter执行,角色按照之前输入的一系列命令顺序执行,还支持撤销和恢复撤销以及重做。玩过吗?
- 命令模式的Invoker和备忘录模式的Caretaker作用相似,怎么理解?
本文介绍在Unity中通过使用命令模式实现回放功能,撤销功能和重做功能。我们可以使用该方法来强化自己的策略类游戏。
你是否想知道《超级食肉男孩》(Super Meat Boy)等游戏是如何实现回放功能的?其中一种方法是完全按照玩家发出的命令执行输入,这意味着输入需要以某种方式存储。
命令模式可用于执行此操作和其他操作。如果你希望在策略游戏里实现撤销和重做功能,命令模式也非常实用。
在本教程中,我们将使用C#实现命令模式,然后使用命令模式来遍历3D迷宫中的机器人角色。
我们会学习到以下内容:
- 命令模式的基础知识。
- 实现命令模式的方法。
- 对输入命令进行排队,并推迟执行。
- 在执行前,撤销和重做已发出的命令。
本教程使用Unity 2019.1和C# 7。
学习准备
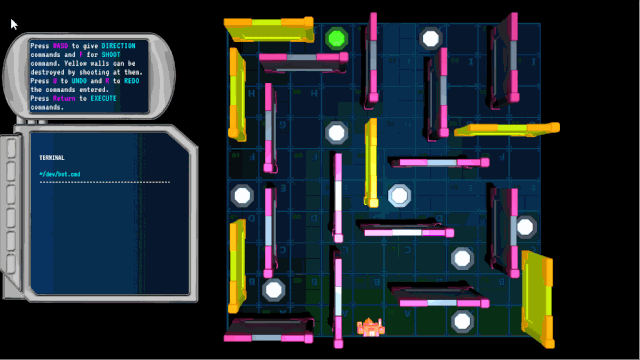
下载完成项目素材后,请解压文件,并在Unity中打开Starter项目。然后打开RW/Scenes文件夹,打开主场景。
如下图所示,场景中有一个迷宫和机器人,左侧有一个显示指令的终端UI。地面的是一个网格,当玩家在迷宫中移动机器人时,这些网格将有助于玩家进行观察。
场景中最有趣的部分是Bot对象,它代表游戏中的机器人,我们在层级窗口单击选中该对象。
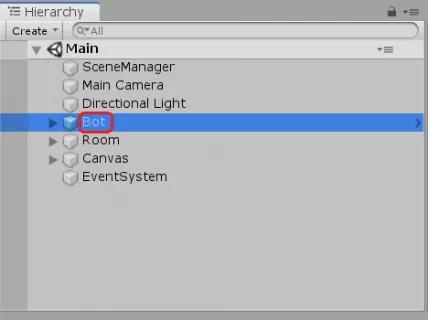
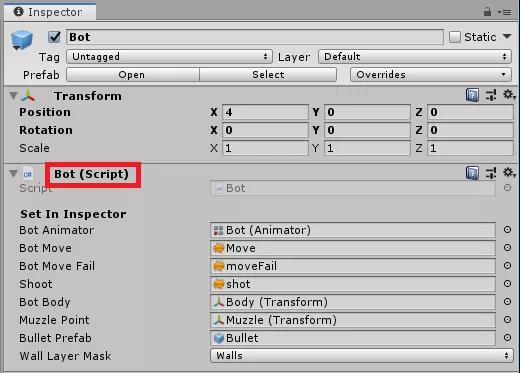
在检视窗口查看该对象,可以看见它带有Bot组件,我们将在发出输入命令时使用该组件。
理解Bot的逻辑
我们打开RW/Scripts文件夹,在代码编辑器打开Bot脚本,了解其中的Move方法和Shoot方法的使用。
Bot.cs
1 | namespace RayWenderlich.CommandPatternInUnity |
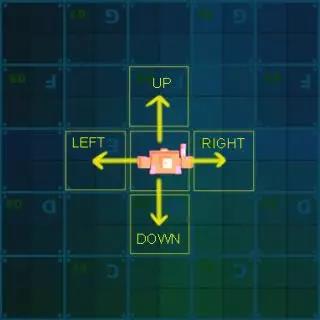
我们发现,Move方法会接收一个类型为CardinalDirection的输入参数。CardinalDirection是一个枚举,类型为CardinalDirection的枚举对象可以为Up、Down、Right或Left。
根据所选的CardinalDirection不同,机器人会在网格上朝着对应方向移动一个网格。
Shoot方法可以让机器人发射炮弹,摧毁黄色的墙体,但对其它墙体毫无作用。
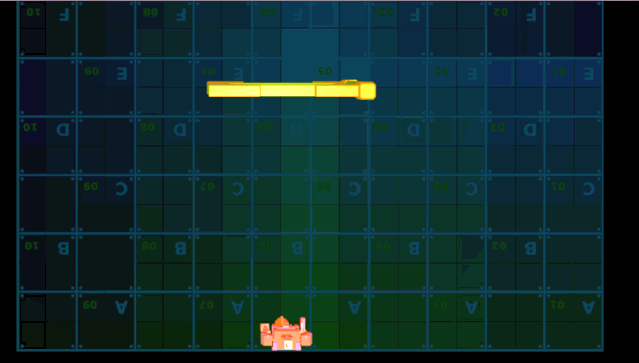
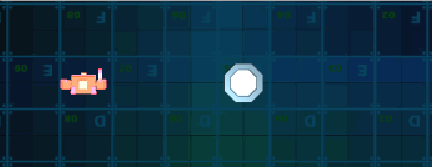
现在查看ResetToLastCheckpoint方法,我们对迷宫进行观察。在迷宫中,有一些点被称为检查点。为了通过迷宫,机器人应该到达绿色检查点。
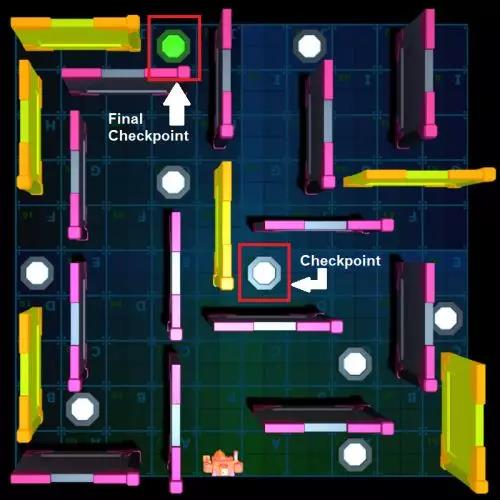
在机器人穿过新检查点时,该点会成为机器人的最后检查点。ResetToLastCheckpoint方法会重置机器人的位置到最后检查点。
什么是命令设计模式
1 | 命令模式把请求封装为对象,从而允许我们使用不同的请求,队列或日志请求,来参数化处理其它对象,并支持可撤销的操作。 |
这么表达或许难以理解,下面我们详细讲解一下。
封装:方法调用封装为对象的过程。

参数化其它对象:封装的方法可以根据输入参数来处理多个对象。
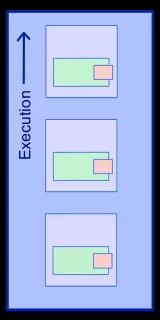
请求的队列:得到的“命令”可以在执行前和其它命令一起存储。
命令队列
“Undoable”(可撤销)指可以通过撤销功能恢复的操作。那么这些内容怎么用代码表示呢?
简单来说,Command类会有Execute方法,该方法可以接收一个名为Receiver的对象作为输入参数。因此,Execute方法会由Command类进行封装。
Command类的多个实例可以作为常规对象来传递,这表示它们可以存储在数据结构中,例如:队列,栈等。
为了执行命令,Execute方法需要进行调用。触发执行过程的类叫作Invoker。
我们的项目中已包含一个名叫BotCommand的空类。下面我们将完成要求,让Bot对象可以使用命令模式执行动作。
移动机器人Bot对象
实现命令模式
首先,打开RW/Scripts文件夹,在编辑器打开BotCommand脚本,并加入下面的代码。1
2
3
4
5
6
7
8
9
10
11
12
13
14
15
16
17
18
19
20
21//1
private readonly string commandName;
//2
public BotCommand(ExecuteCallback executeMethod, string name)
{
Execute = executeMethod;
commandName = name;
}
//3
public delegate void ExecuteCallback(Bot bot);
//4
public ExecuteCallback Execute { get; private set; }
//5
public override string ToString()
{
return commandName;
}
代码解读:
- 1.commandName变量用于存储用户可以理解的命令名称。
- 2.BotCommand构造函数会接收一个函数和一个字符串,它帮助我们设置Command对象的Execute方法和名称。
- 3.ExecuteCallback委托会定义封装方法的类型。封装方法会返回void类型,接收类型为Bot对象作为输入参数。
- 4.Execute属性会引用封装方法,我们要使用它来调用封装方法。
- 5.ToString方法会被重写,返回commandName字符串,该方法主要在UI中使用。
保存改动,现在我们已经实现了命令模式。
创建命令
我们从RW/Scripts文件夹中打开BotInputHandler脚本。
我们将创建BotCommand的5个实例,这些实例会分别封装方法,从而让Bot对象向上、下、左、右移动,以及让机器人发射炮弹。
添加下列代码到BotCommand类中。1
2
3
4
5
6
7
8
9
10
11
12
13
14
15
16
17
18
19//1
private static readonly BotCommand MoveUp =
new BotCommand(delegate (Bot bot) { bot.Move(CardinalDirection.Up); }, "moveUp");
//2
private static readonly BotCommand MoveDown =
new BotCommand(delegate (Bot bot) { bot.Move(CardinalDirection.Down); }, "moveDown");
//3
private static readonly BotCommand MoveLeft =
new BotCommand(delegate (Bot bot) { bot.Move(CardinalDirection.Left); }, "moveLeft");
//4
private static readonly BotCommand MoveRight =
new BotCommand(delegate (Bot bot) { bot.Move(CardinalDirection.Right); }, "moveRight");
//5
private static readonly BotCommand Shoot =
new BotCommand(delegate (Bot bot) { bot.Shoot(); }, "shoot");
在每个实例中,都有一个匿名方法传到构造函数。该匿名方法会封装在相应命令对象之中,每个匿名方法的签名都符合ExecuteCallback委托设置的要求。
此外,构造函数的第二个参数是一个字符串,表示用于指代命令的名称。该名称会通过命令实例的ToString方法返回,它会在后面为UI使用。
在前4个实例中,匿名方法会在Bot对象上调用Move方法。
对于MoveUp、MoveDown、MoveLeft和MoveRight命令,传入Move方法的参数分别是CardinalDirection.Up,CardinalDirection.Down,CardinalDirection.Left和CardinalDirection.Right,这些参数对应着Bot对象的不同移动方向。
在第5个实例上,匿名方法在Bot对象调用Shoot方法。这将在执行该命令时,让机器人发射炮弹。
现在我们创建了命令,这些命令需要在用户发出输入时进行访问。请将下面的代码添加到BotInputHandler中。1
2
3
4
5
6
7
8
9
10
11
12
13
14
15
16
17
18
19
20
21
22
23
24
25public static BotCommand HandleInput()
{
if (Input.GetKeyDown(KeyCode.W))
{
return MoveUp;
}
else if (Input.GetKeyDown(KeyCode.S))
{
return MoveDown;
}
else if (Input.GetKeyDown(KeyCode.D))
{
return MoveRight;
}
else if (Input.GetKeyDown(KeyCode.A))
{
return MoveLeft;
}
else if (Input.GetKeyDown(KeyCode.F))
{
return Shoot;
}
return null;
}
HandleInput方法会根据用户的按键,返回单个命令实例。继续下一步前,保存改动内容。
使用命令
现在我们要使用创建好的命令。打开RW/Scripts文件夹,在代码编辑器打开SceneManager脚本。在该类中,我们会发现有UIManager类型的uiManager变量的引用。
UIManager类为场景中的终端UI提供了实用的功能性方法。此外,Bot变量引用了附加到Bot对象的Bot组件。
UIManager.cs
1 | namespace RayWenderlich.CommandPatternInUnity |
我们将下面的代码添加给SceneManager类,替换代码注释//1的已有代码。
1 | namespace RayWenderlich.CommandPatternInUnity |
1 | //1 |
保存代码,通过使用这些代码,我们可以在游戏视图正常运行项目。
运行游戏并测试命令模式
现在要构建所有内容,在Unity编辑器按下Play按钮。
我们可以使用W,A,S,D按键输入方向命令。输入射击模式时,使用F键。最后按下回车键执行命令。

现在观察代码添加到终端UI的方式。命令会通过它们在UI中的名称表示,该效果通过commandName变量实现。
在执行前,UI会滚动到顶部,执行后的代码行会被移除。
详解命令代码
现在我们详解在使用命令部分添加的代码。
1.botCommands列表存储了BotCommand实例的引用。考虑到内存,我们只可以创建5个命令实例,但有多个引用指向相同的命令。此外,executeCoroutine变量引用了ExecuteCommandsRoutine,后者会处理命令的执行过程。
2.如果用户按下回车键,更新检查结果,此时它会调用ExecuteCommands,否则会调用CheckForBotCommands。
3.CheckForBotCommands使用来自BotInputHandler的HandleInput静态方法,检查用户是否发出输入信息,此时会返回命令。返回的命令会传递到AddToCommands。然而,如果命令被执行的话,即如果executeRoutine不是空的话,它会直接返回,不把任何内容传递给AddToCommands。因此,用户必须等待执行过程完成。
4.AddToCommands给返回的命令实例添加了新引用,返回到botCommands。
5.UIManager类的InsertNewText方法会给终端UI添加新一行文字。该行文字是作为输入参数传给方法的字符串。我们会在此给它传入commandName。
6.ExecuteCommands方法会启动ExecuteCommandsRoutine。
7.UIManager类的ResetScrollToTop会向上滚动终端UI,它会在执行过程开始前完成。
8.ExecuteCommandsRoutine有一个for循环,它会迭代botCommands列表中的命令,通过把Bot对象传给Execute属性返回的方法,逐个执行这些命令。在每次执行后,我们会添加CommandPauseTimeseconds时长的暂停。
9.UIManager类的RemoveFirstTextLine方法会移除终端UI里的第一行文字,只要那里仍有文字。因此,每个命令执行后,它的相应名称会从终端UI移除。
10.执行所有命令后,botCommands会清空,机器人会使用ResetToLastCheckpoint,重置到最后检查点。接着,executeRoutine会设为null,用户可以继续发出更多输入信息。
实现撤销和重做功能
我们再运行一次场景,尝试到达绿色检查点。现在无法撤销输入的命令,这意味着如果犯了错,我们无法后退,除非执行完所有命令。
我们可以通过添加撤销功能和重做功能来解决该问题。返回SceneManager.cs脚本,在botCommands的List声明后添加以下变量声明。1
private Stack <BotCommand> undoStack = new Stack <BotCommand>();
undoStack变量属于来自Collections命名空间的Stack类,它会存储撤销的命令引用。
现在,我们要分别为撤销和重做添加UndoCommandEntry和RedoCommandEntry两个方法。在SceneManager类中,添加下面代码到ExecuteCommandsRoutine后。1
2
3
4
5
6
7
8
9
10
11
12
13
14
15
16
17
18
19
20
21
22
23
24
25
26private void UndoCommandEntry()
{
//1
if (executeRoutine != null || botCommands.Count == 0)
{
return;
}
undoStack.Push(botCommands[botCommands.Count - 1]);
botCommands.RemoveAt(botCommands.Count - 1);
//2
uiManager.RemoveLastTextLine();
}
private void RedoCommandEntry()
{
//3
if (undoStack.Count == 0)
{
return;
}
var botCommand = undoStack.Pop();
AddToCommands(botCommand);
}
解读这部分代码:
1.如果命令正在执行,或botCommands列表是空的,UndoCommandEntry方法不执行任何操作。否则,它会把最后输入的命令引用推送到undoStack上。这部分代码也会从botCommands列表移除命令引用。
2.UIManager类的RemoveLastTextLine方法会移除终端UI的最后一行文字,这样在发生撤销时,终端UI内容符合botCommands的内容。
3.如果undoStack为空,RedoCommandEntry不执行任何操作。否则,它会把最后的命令从undoStack移出,然后通过AddToCommands把命令添加到botCommands列表。
现在我们添加键盘输入来使用这些方法。在SceneManager类中,把Update方法的主体替换为下列代码。1
2
3
4
5
6
7
8
9
10
11
12
13
14
15
16if (Input.GetKeyDown(KeyCode.Return))
{
ExecuteCommands();
}
else if (Input.GetKeyDown(KeyCode.U)) //1
{
UndoCommandEntry();
}
else if (Input.GetKeyDown(KeyCode.R)) //2
{
RedoCommandEntry();
}
else
{
CheckForBotCommands();
}
现在按下U键会调用UndoCommandEntry方法,按下R键会调用RedoCommandEntry方法。
处理边缘情况
现在我们快要完成该教程了,在完成前,我们要确定二件事:
- 输入新命令时,undoStack应该被清空。
- 执行命令前,undoStack应该被清空。
首先,我们给SceneManager添加一个新方法。添加下面的方法到CheckForBotCommands之后。1
2
3
4
5private void AddNewCommand(BotCommand botCommand)
{
undoStack.Clear();
AddToCommands(botCommand);
}
该方法会清空undoStack,然后调用AddToCommands方法。
现在把CheckForBotCommands内的AddToCommands调用替换为下列代码:1
AddNewCommand(botCommand);
最后,复制粘贴下列代码到ExecuteCommands方法内的if语句中,从而在执行前清空undoStack。1
undoStack.Clear();
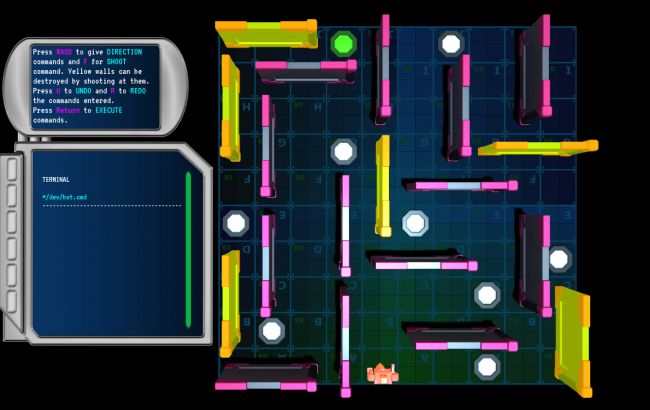
现在项目终于完成了,我们保存并构建项目。在Unity编辑器单击Play按钮。输入命令,按下U键撤销命令,按下R键恢复被撤销的命令。
下图展示了让机器人到达绿色检查点。